Welcome back everyone!
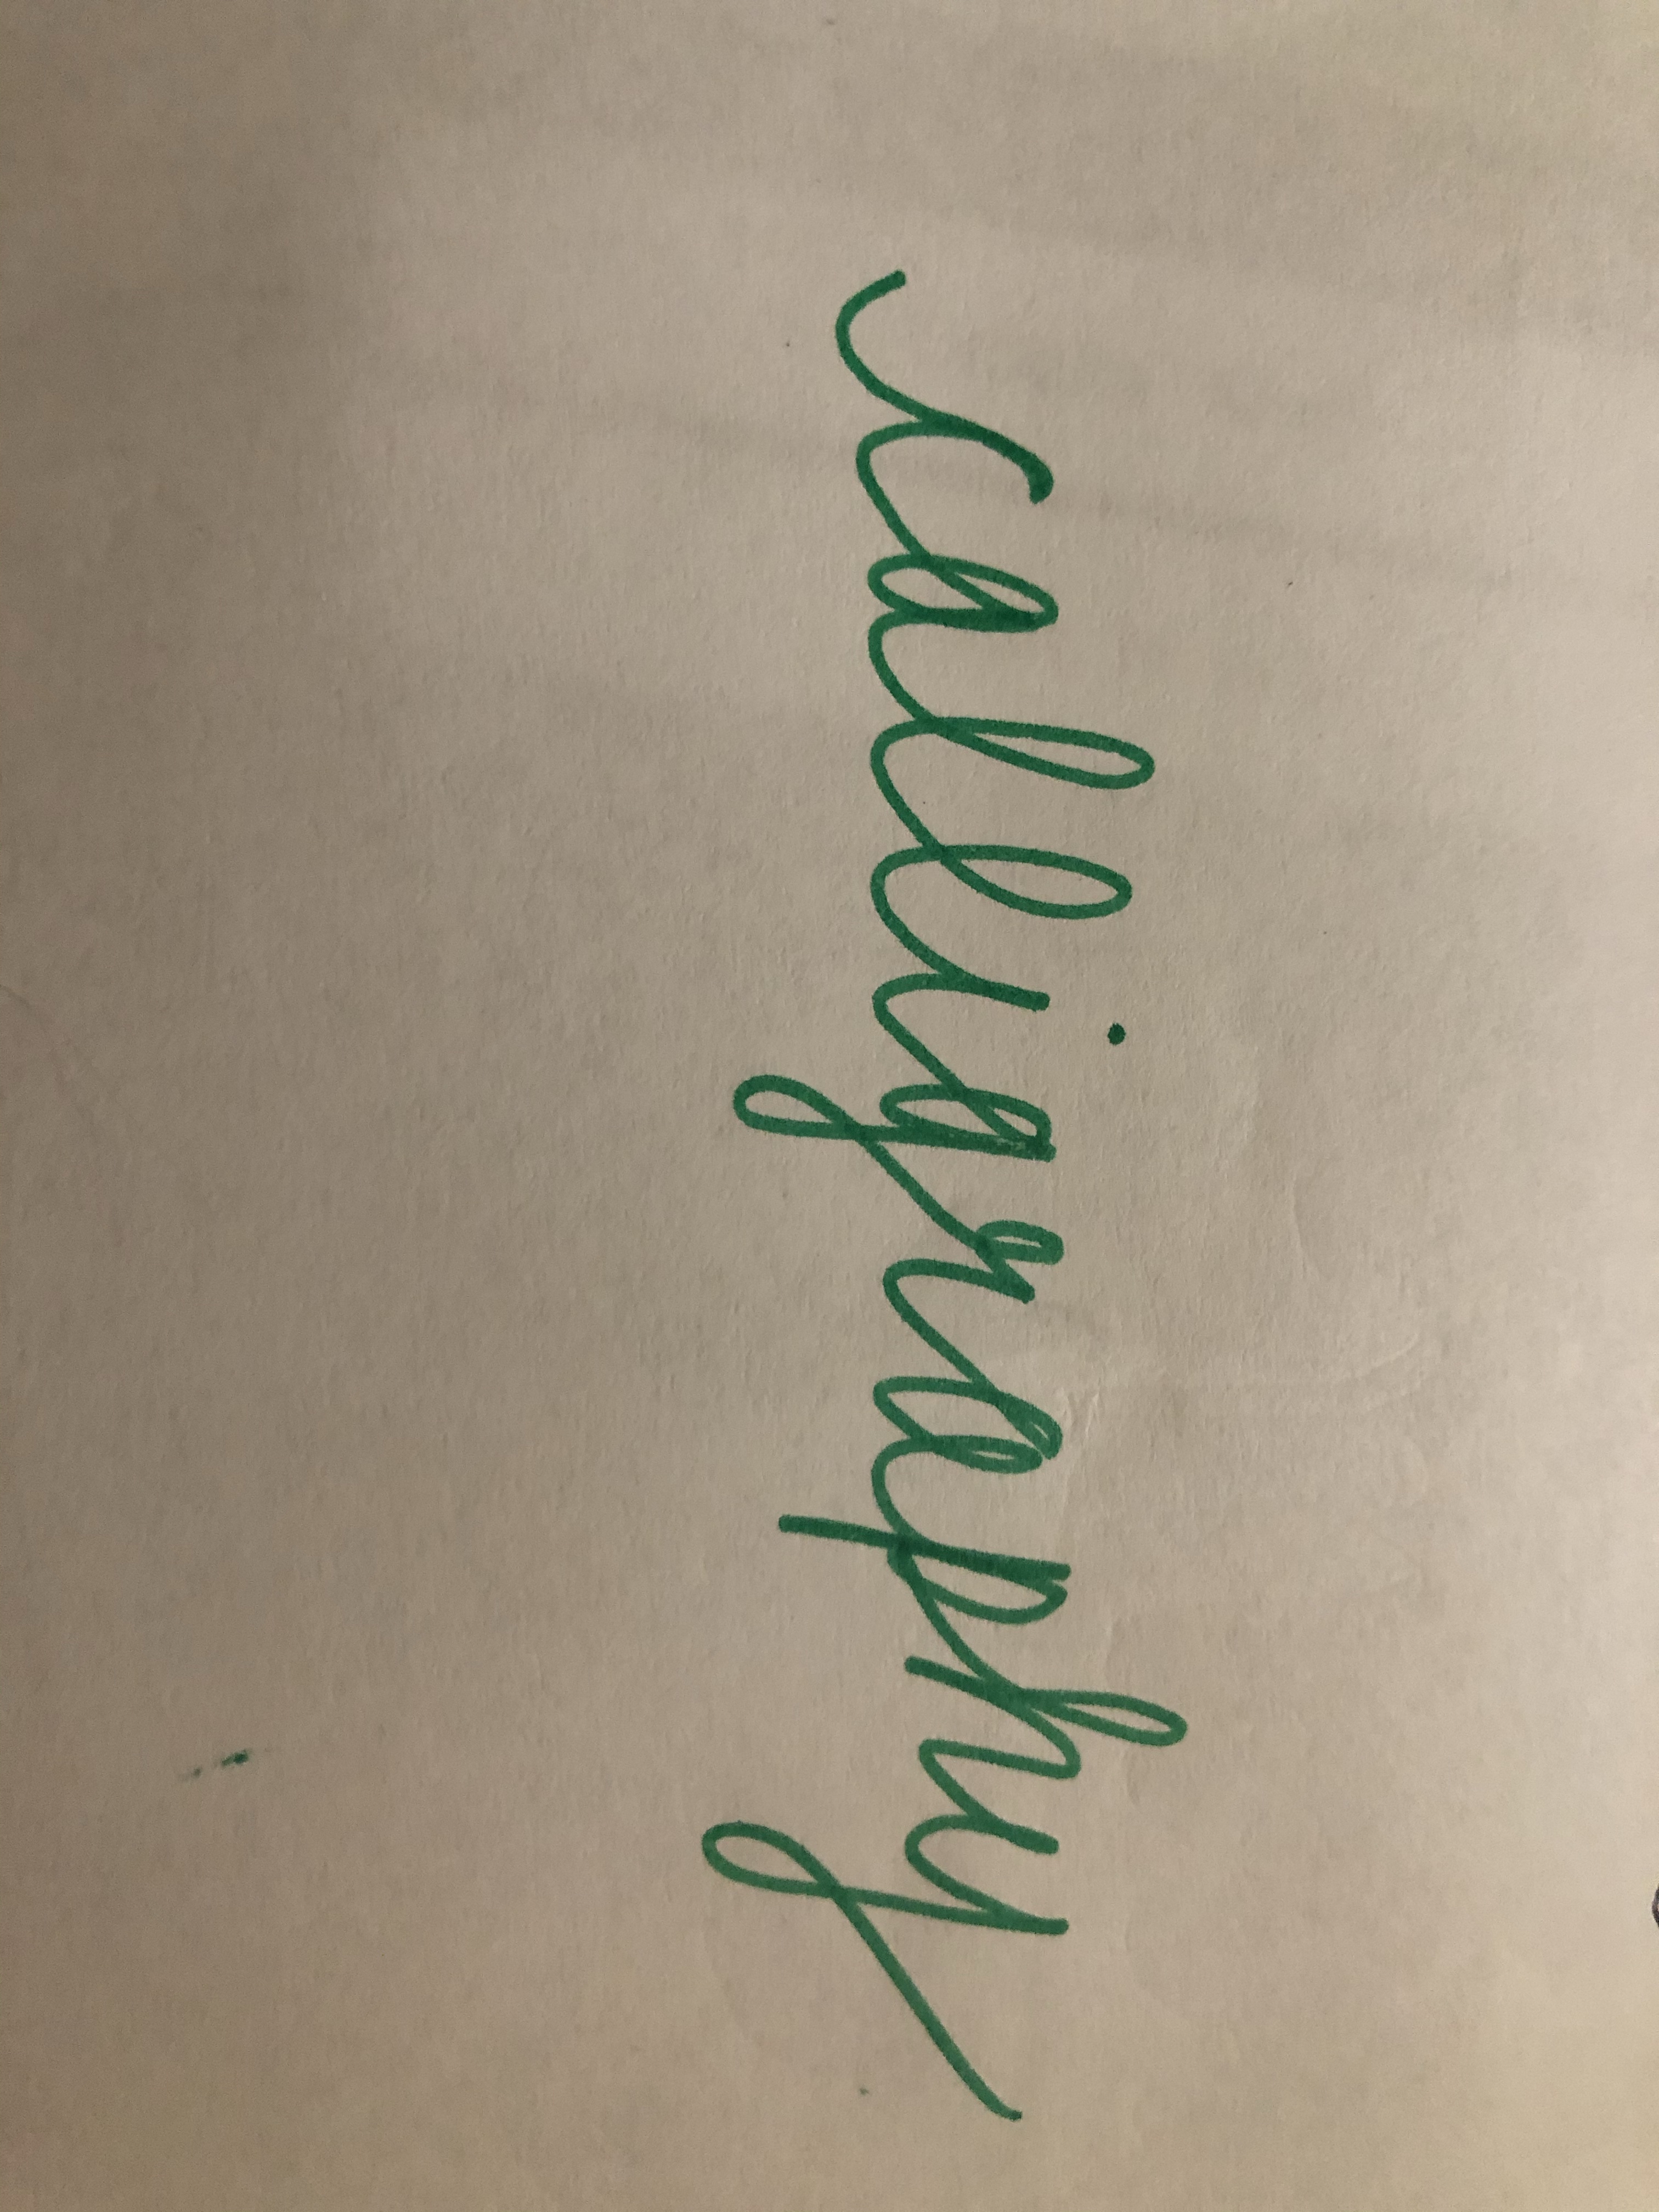
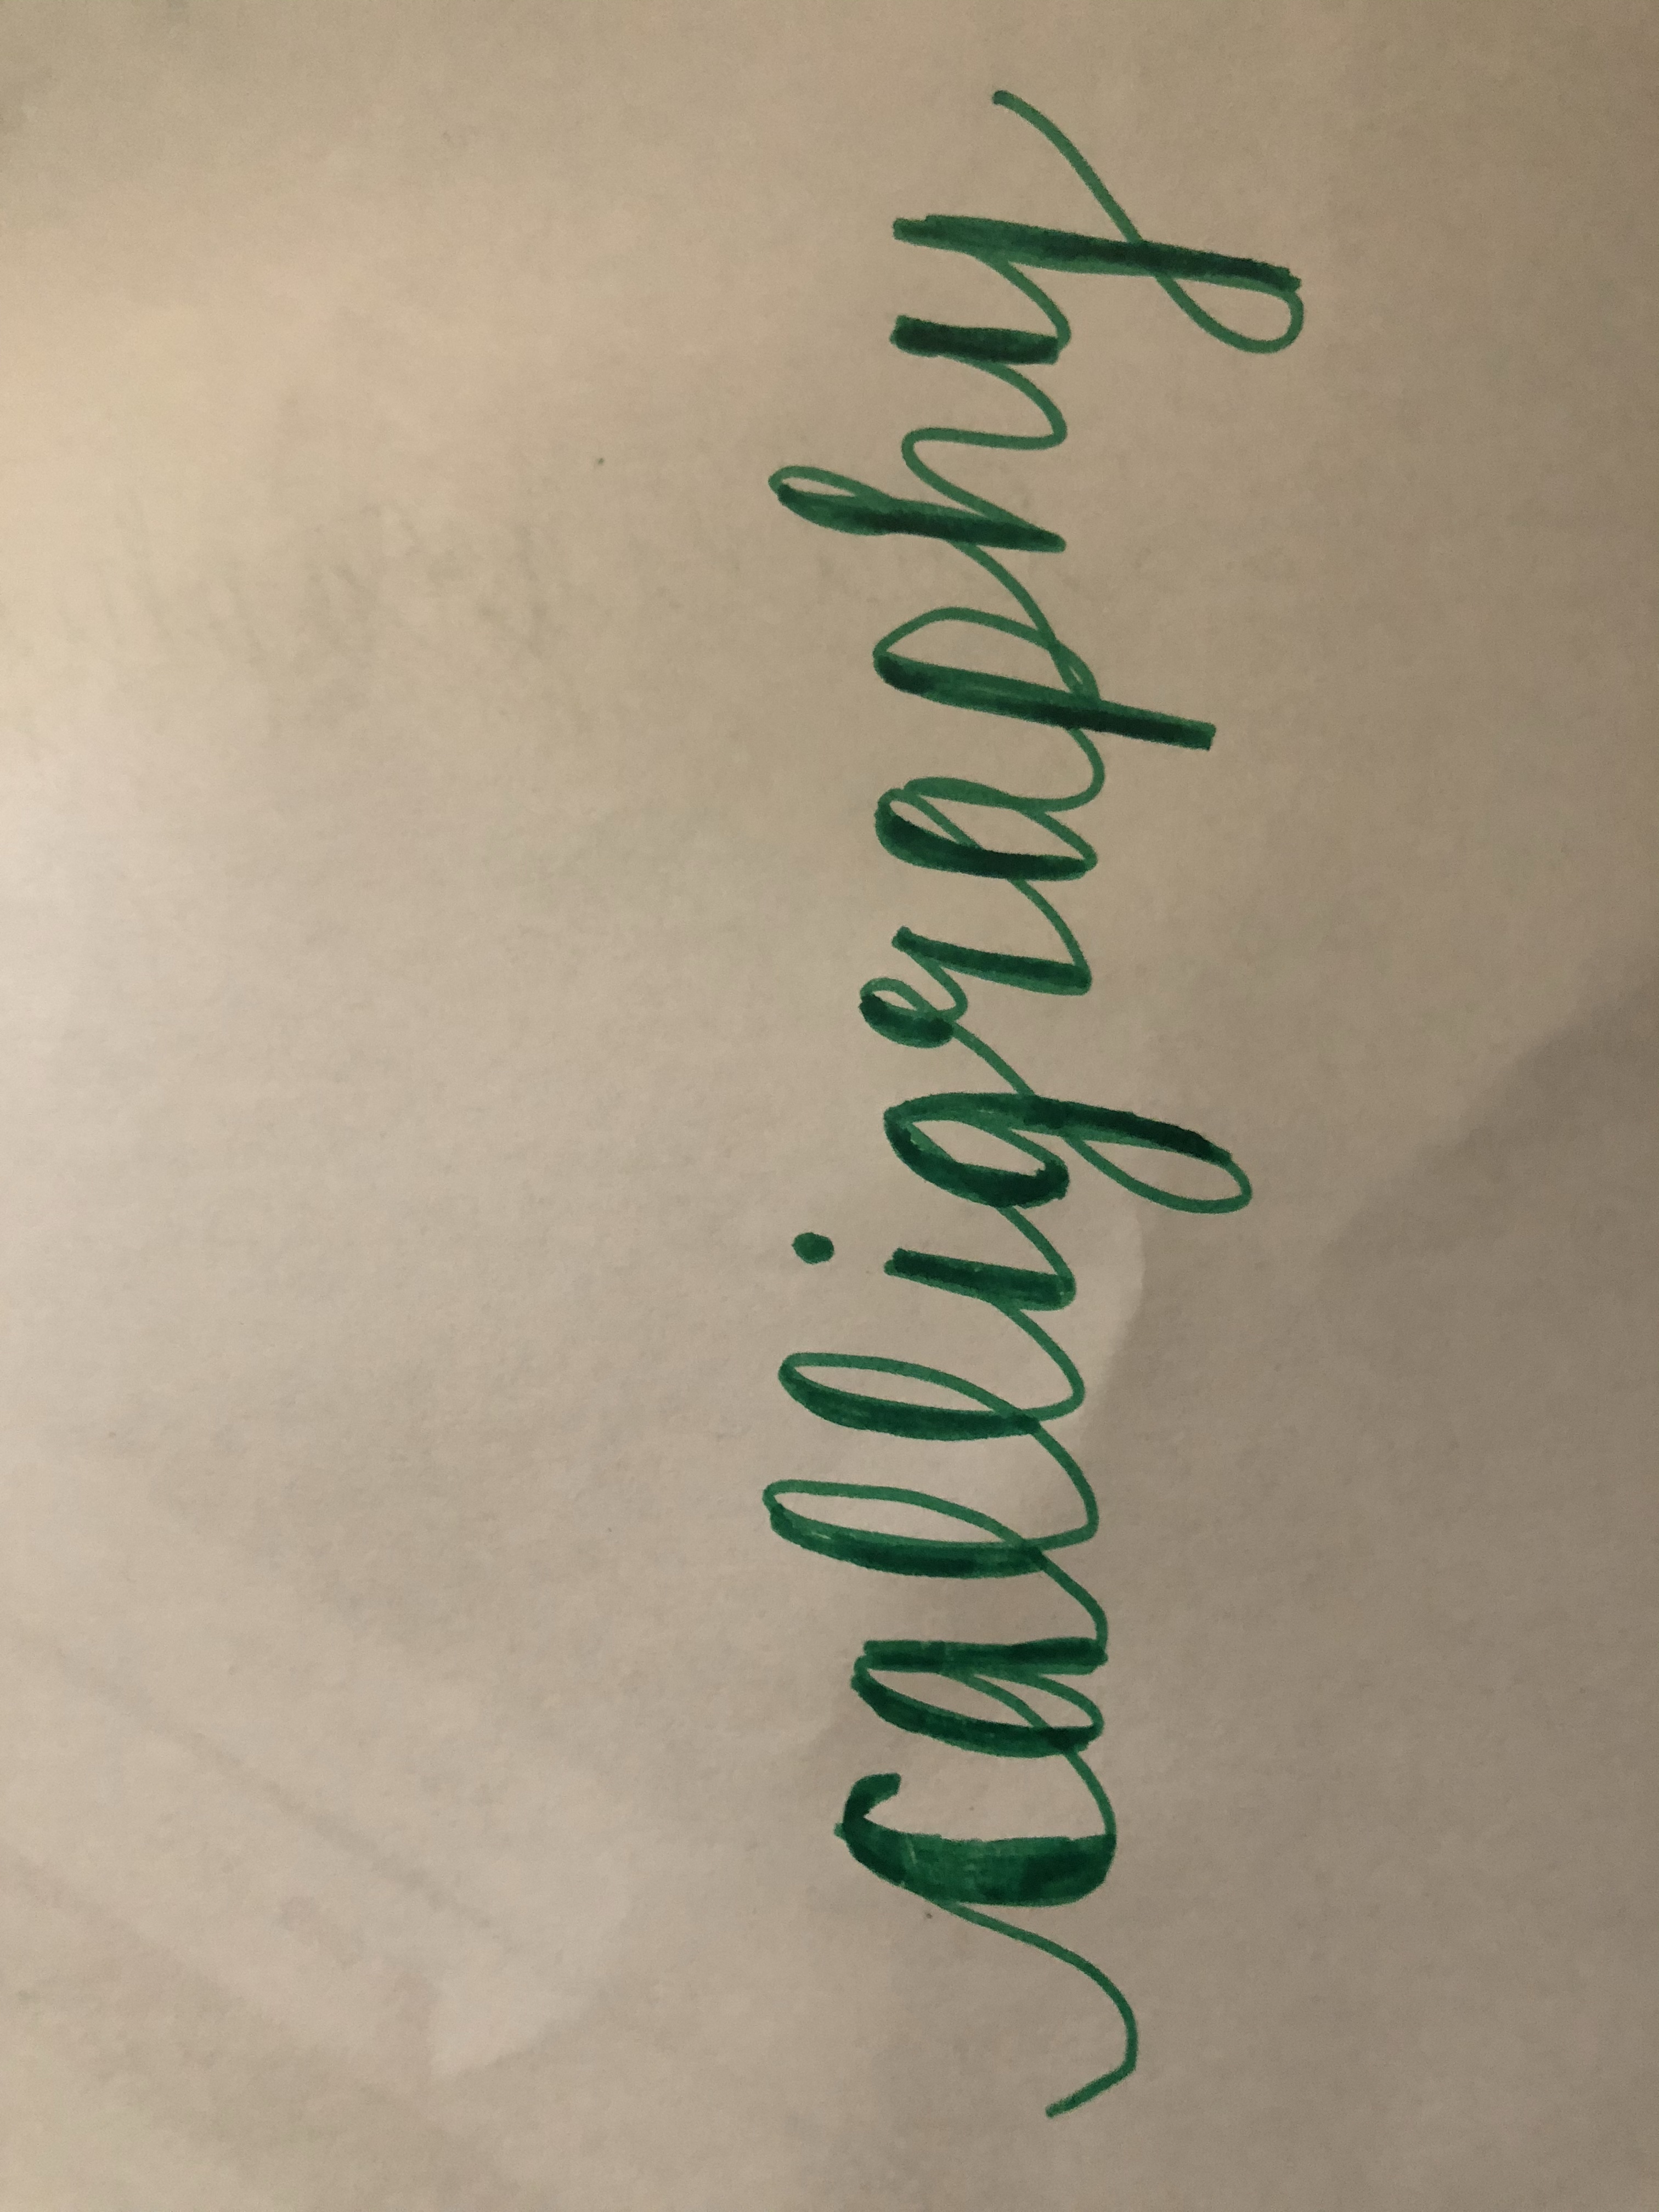
I’ve always been amazing by the beautiful calligraphy and handwriting of bullet-journalers and otherwise artistically talented friends/people/Instagrammers, but I’ve never really made an effort to try and learn myself. That is, until recently. Over the past month or so, I’ve on-and-off worked on teaching myself the basics of calligraphy. I already had decently-okay cursive, so I just needed to watch a couple of YouTube videos and practice. Trust me- if I can do it, you can too. That being said, I know it’s intimidating (that’s the reason I held off on even trying for so long), so I figured I would make this little guide for people in similar situations.
- Improve your normal cursive – You’ll want to have pretty neat/legible cursive before you embark on your calligraphy journey. You don’t have to have perfect writing by any means- just be confident enough in your cursive that you can take the next step.
- Watch YouTube videos – This is how I figured out most of the basics- the main point being making your downstrokes on all your letters thicker. There are also lots of books available for purchase that teach the basics of calligraphy, but I think videos are more helpful because you can see the way the “professionals” do it in real time, and watch it over and over as many times as necessary while you follow along. I guess it depends what kind of learner you are though, so if you think the books will be worth it for you, totally go for it!
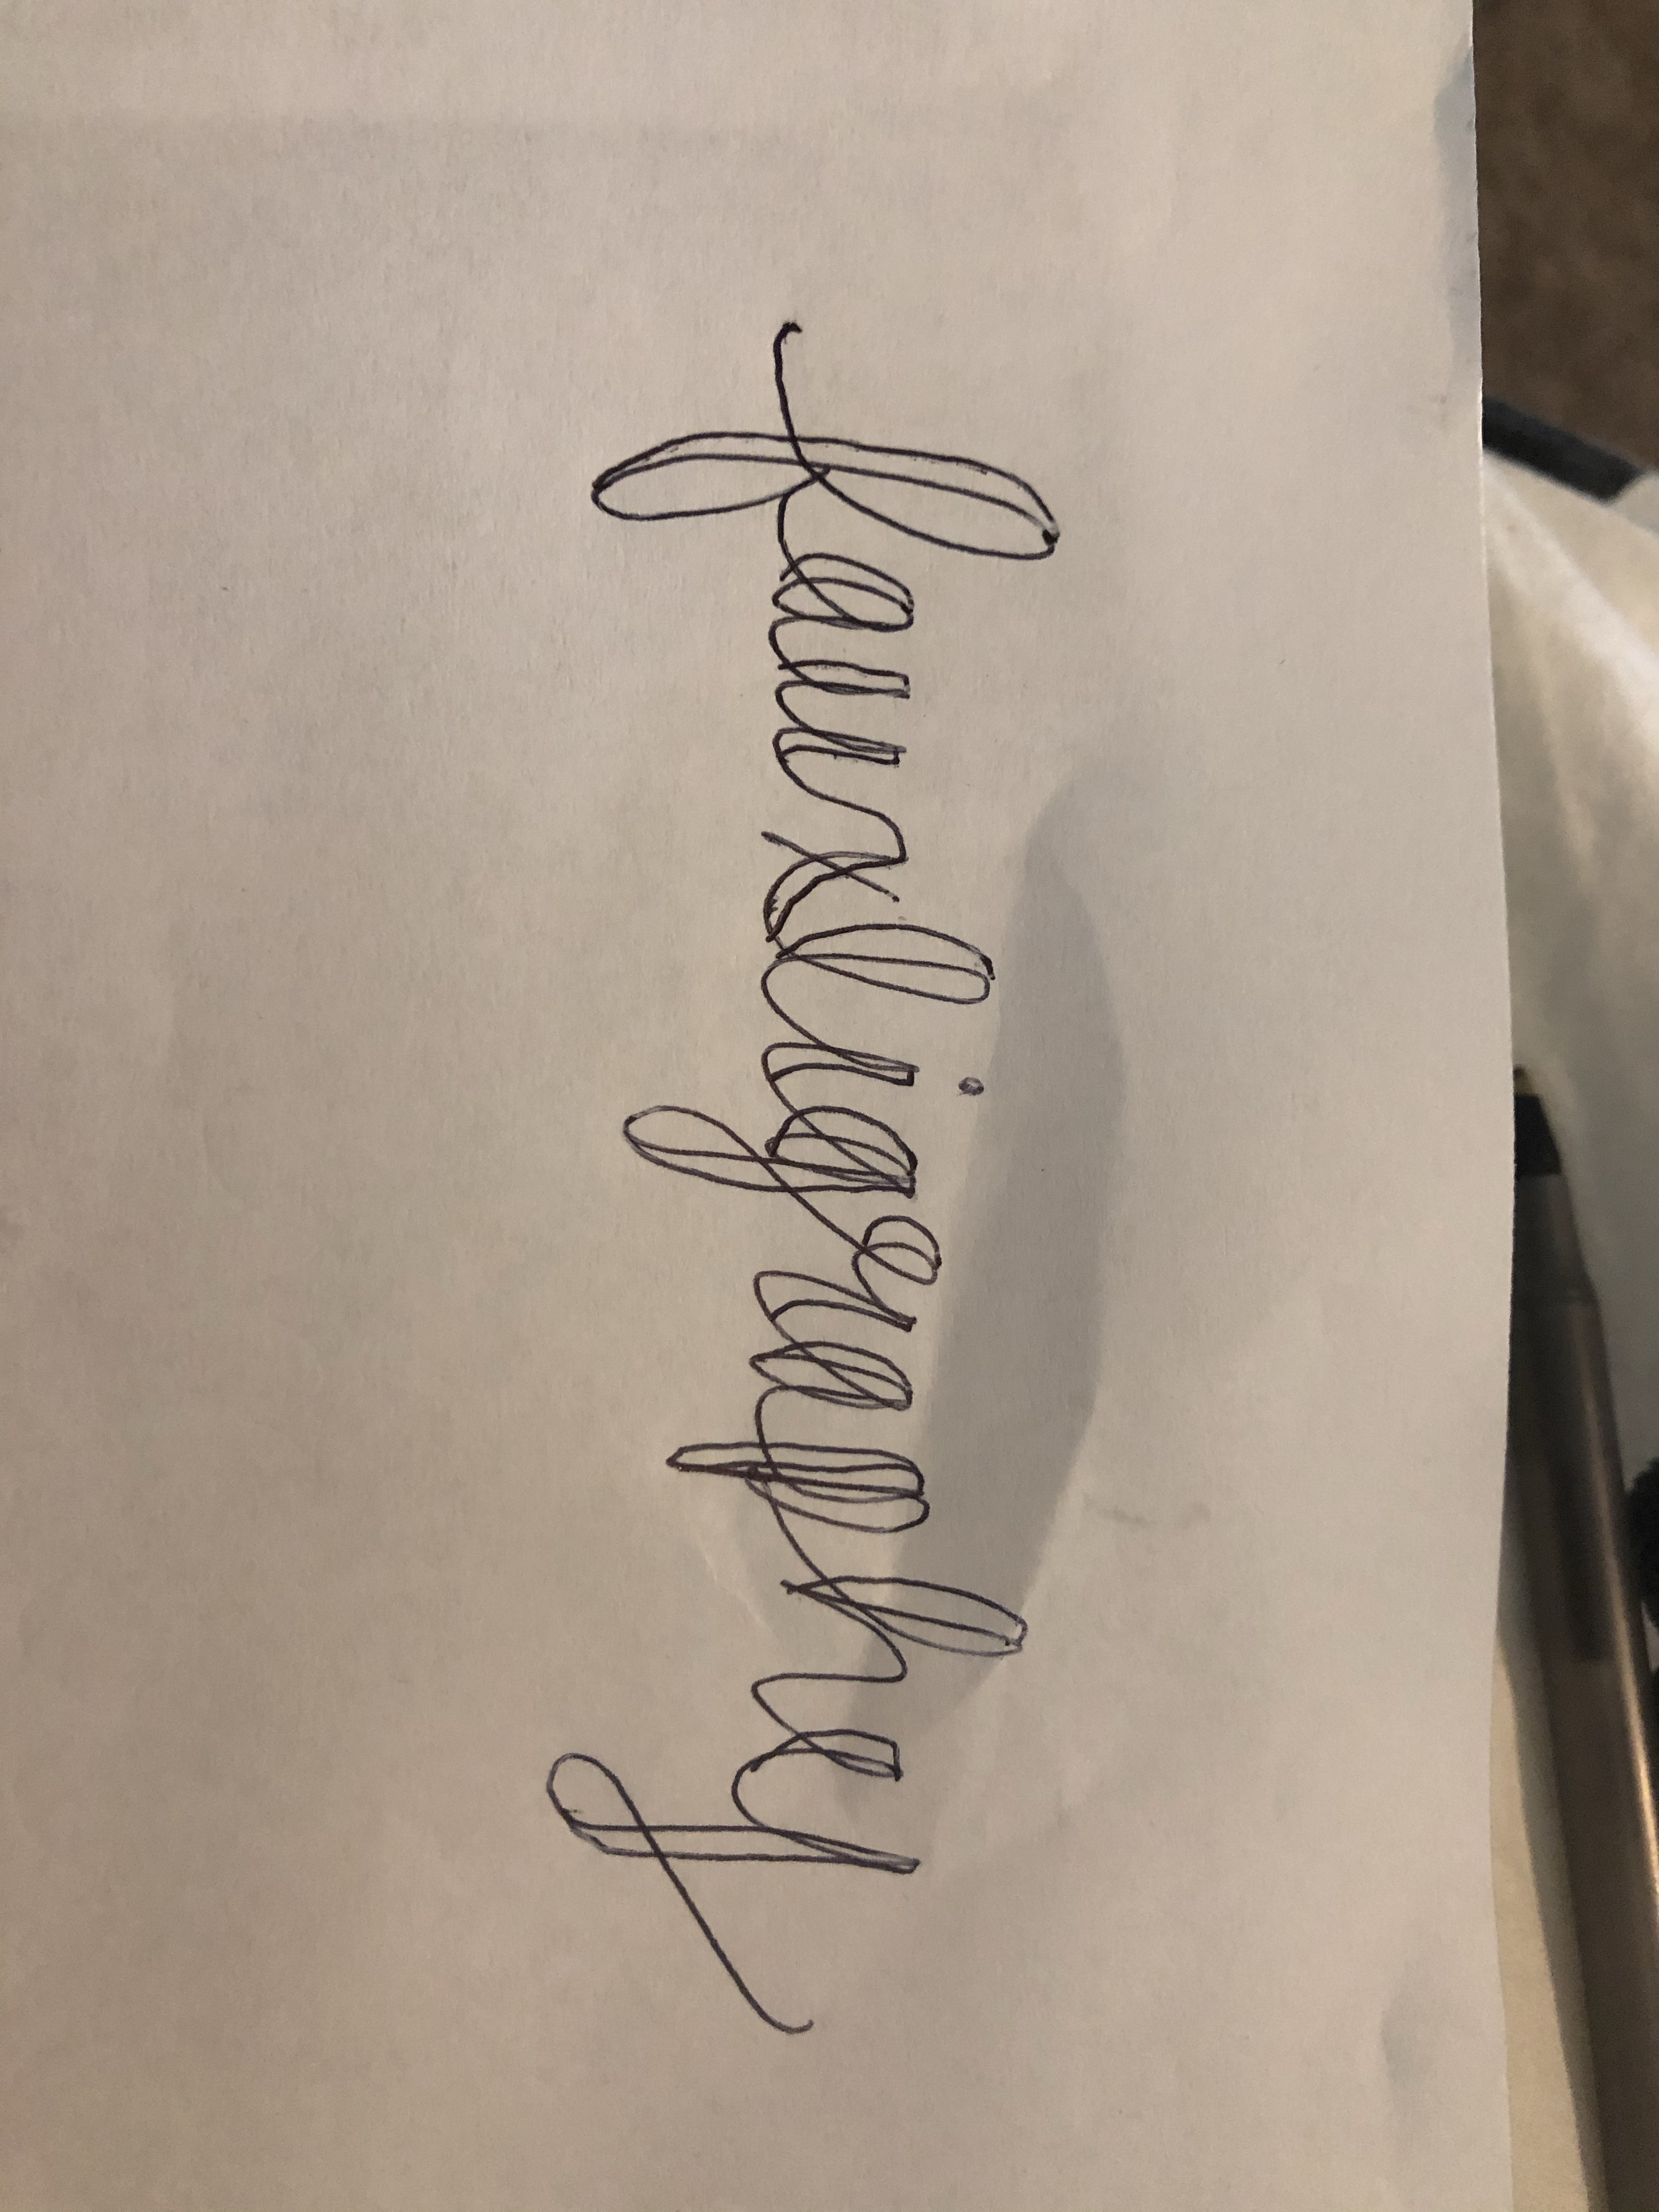
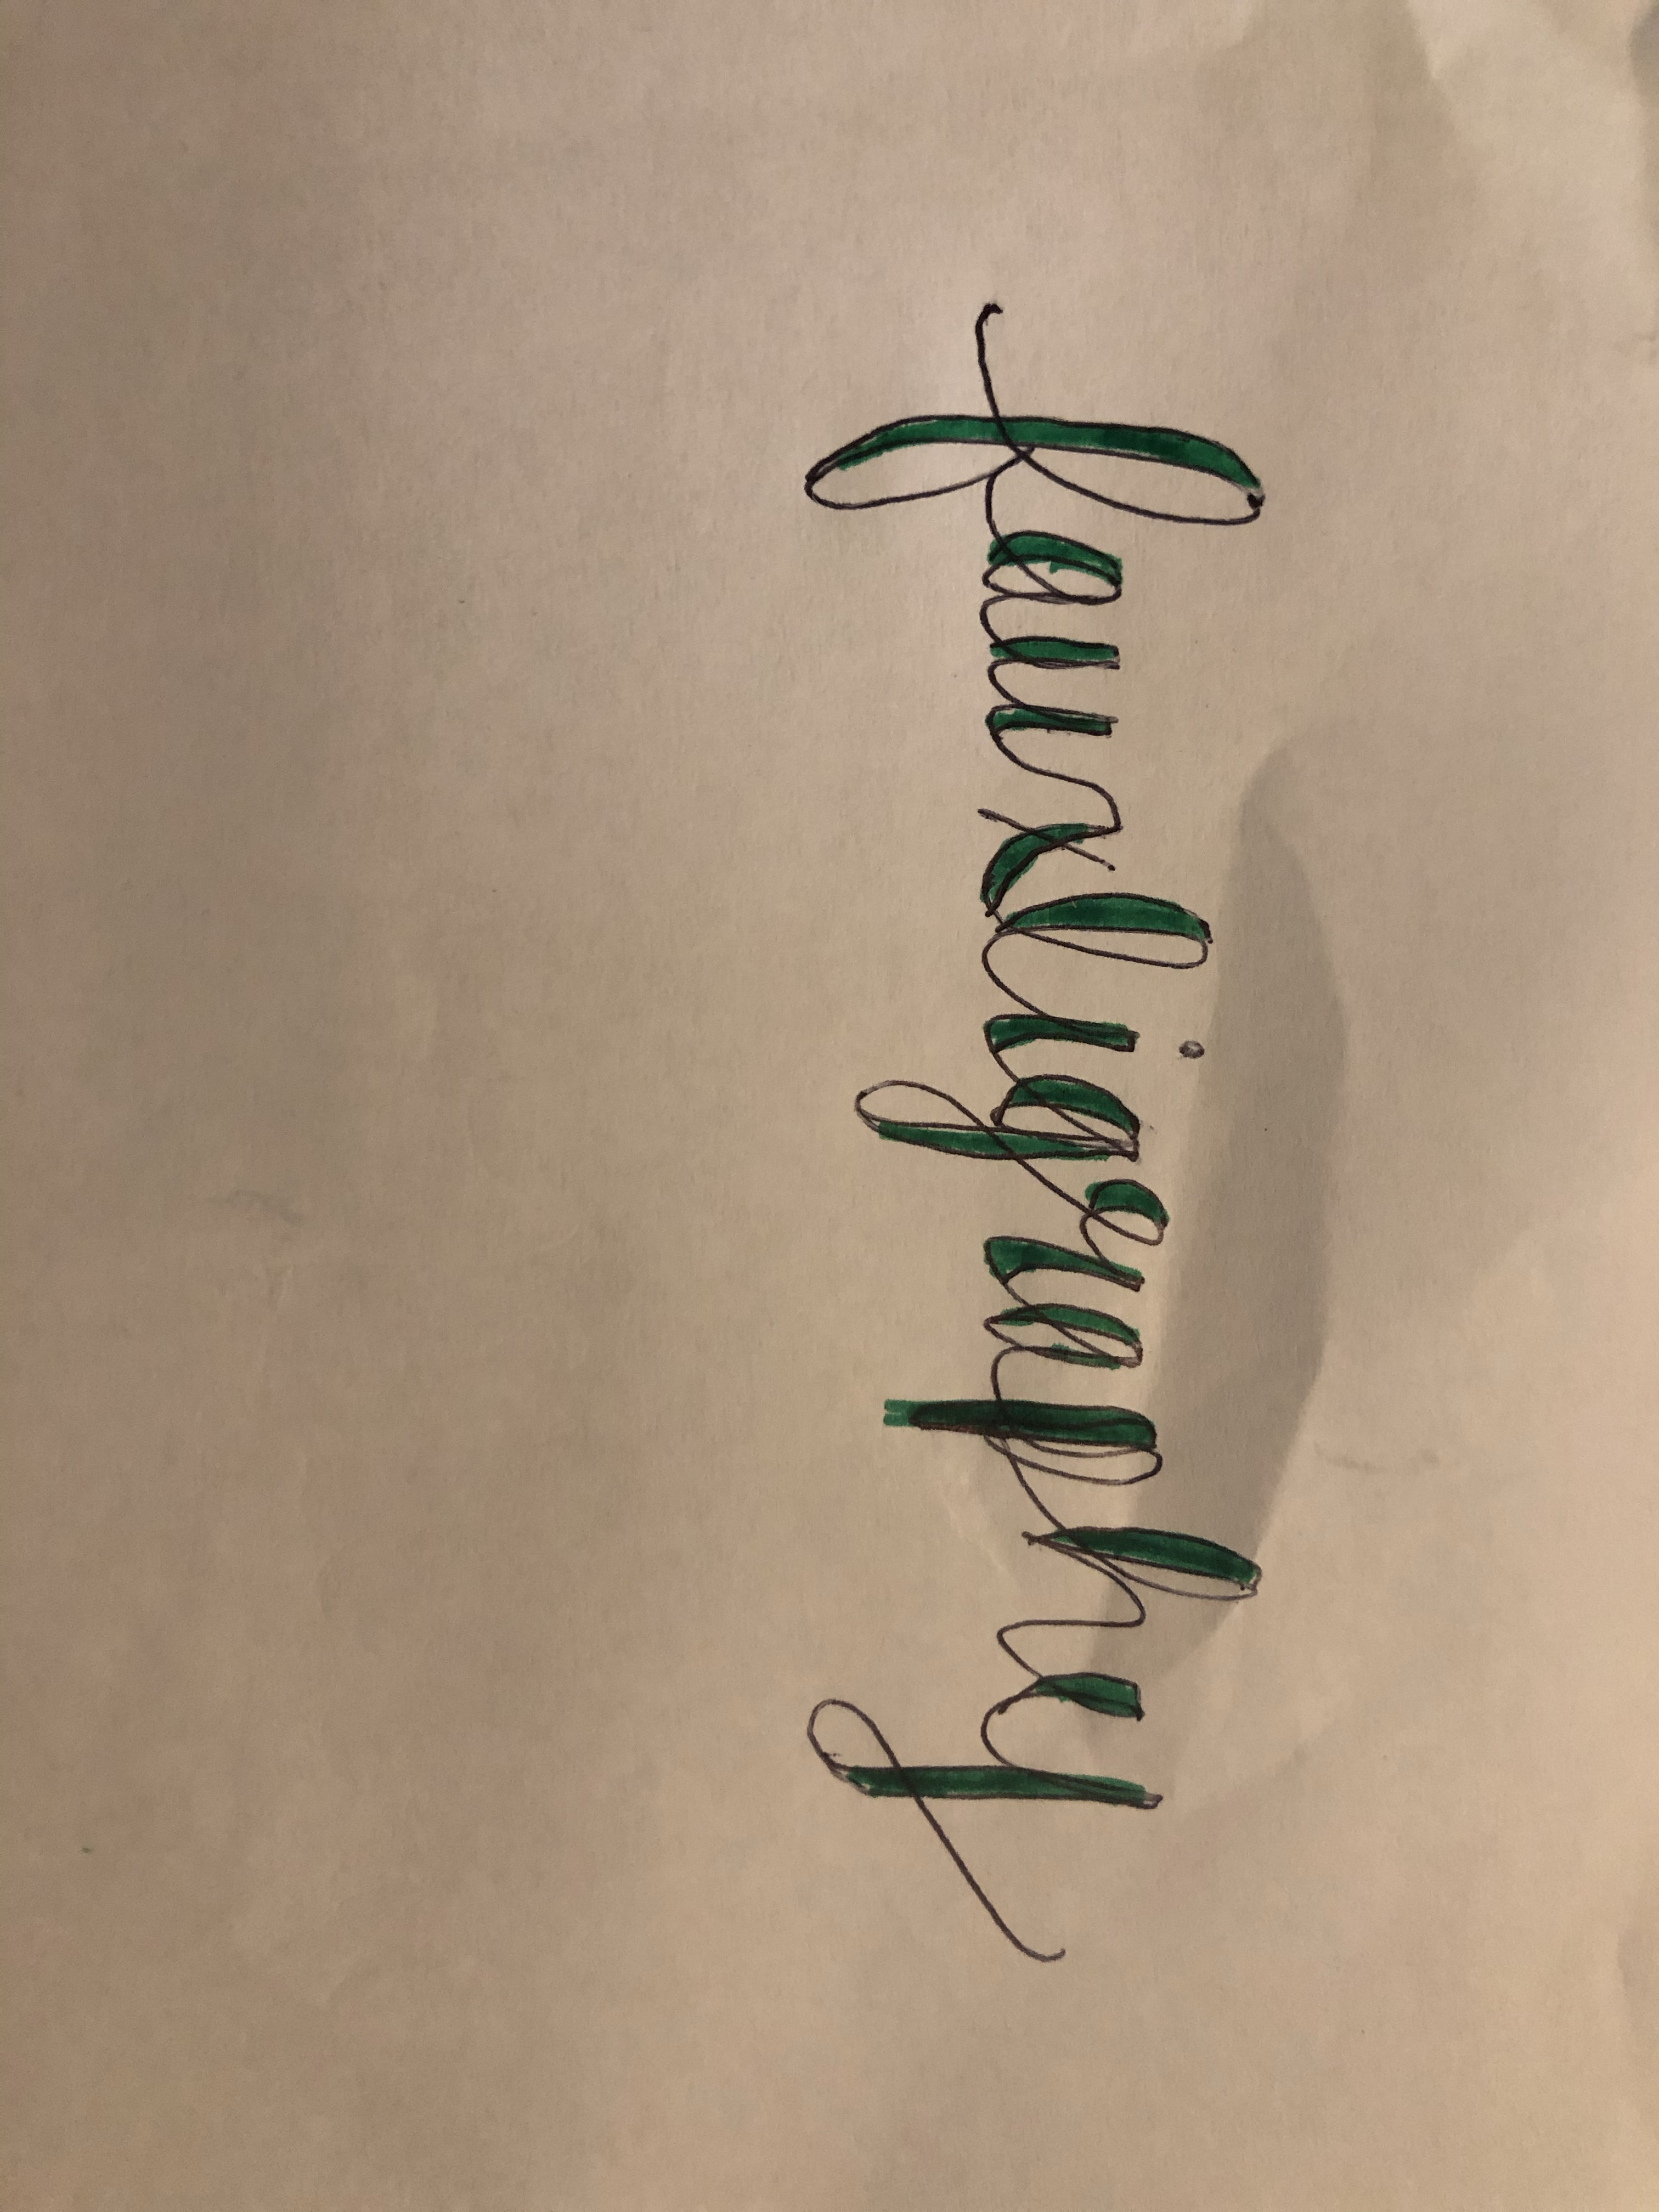
- Start with fauxligraphy – Most videos/books/guides will explain this in more detail, but it’s basically where you’ll write in normal cursive and then outline and color in/thicken the downstrokes of the letters. It can take a while (which is why actual calligraphy is more efficient) but it helps so much in the long run and I think it’s an important step before you attempt the real deal. Also, it still looks great- if you don’t have “professional” calligraphy supplies, you may even prefer fauxligraphy until you’re willing to invest in brush pens and the like. I’ve been sticking to fauxligraphy for the most part since it works fine for my purposes and I haven’t gotten a chance to buy supplies that would make actual calligraphy easy to do.
- Transition into doing actual calligraphy – As you get more comfortable with fauxligraphy, start doing the thickened downstrokes as you write in cursive, rather than outlining and coloring in afterwards. You’ve made it to the real deal! It should get easier, quicker, and more natural as you keep practicing.
- Practice a lot!!!! – I found the best way to practice was to look up examples of words/sentences in calligraphy and try to copy them. You can just look up calligraphy on Google Images, or you can even make a Pinterest board full of inspiration. You might also come across practice worksheets, which can be helpful as well.
- Experiment with styles – Everyone’s handwriting is a little bit different, therefore everyone’s calligraphy and lettering will be unique as well. If there’s one particular style of writing you like, I suggest finding as many inspiration pictures as possible and copying it. Otherwise, just keep practicing and along the way you’ll find what’s most natural for you.
I hope this inspires you to improve your own handwriting and give calligraphy a try. I’m definitely not claiming to be an expert or an incredible teacher, but I wanted to show you guys it’s definitely possible to do without being super artsy. Another disclaimer: you totally don’t need to buy all the official calligraphy supplies such as brush pens and the like right away! I just use highlighters, markers, and pens- it does make it a bit harder and sometimes I have to resort to fauxligraphy, but it has a similar end result and is still fun to practice. If you end up being really into it, then totally go buy all of the supplies; I just wanted to put it out there that it’s not something you have to spend money on in order to do.
Happy writing!
Brooke
